Here’s a short time lapse video of our Aircraft Department removing wing panels from the Benoist reproduction. The wings still need to be prepped, covered with fabric and then doped.
Tick Tick Tick Tick
Our scaled down museum operates seasonally. Please check our calendar for operating days & hours. Thank you for your support. Click here for our calendar.
Here’s a short time lapse video of our Aircraft Department removing wing panels from the Benoist reproduction. The wings still need to be prepped, covered with fabric and then doped.
Tick Tick Tick Tick
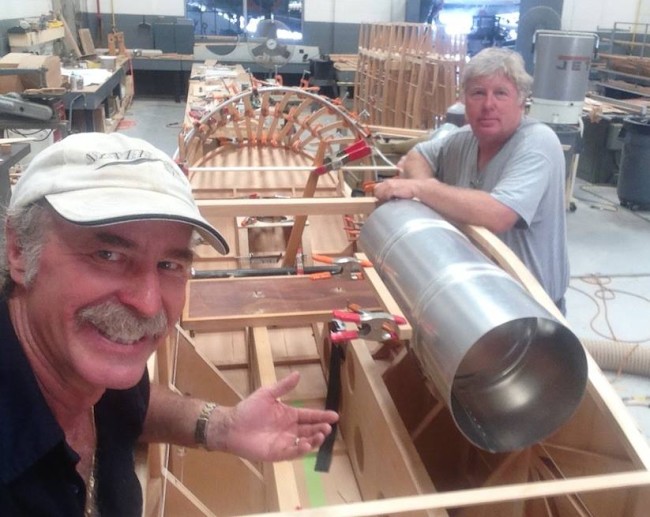
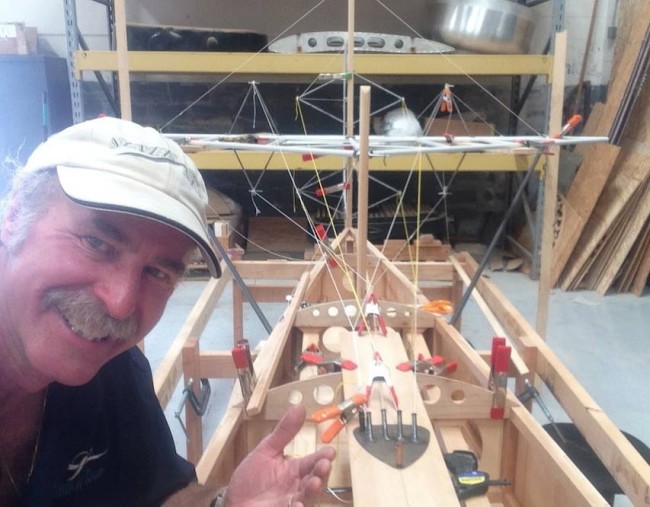
Progress is being made in leaps and bounds as the end of the year looms. Here are some more visual updates from Kermit. Do you think we’ll make it in time?!
All of the fabric for the wing panels have been sewn up and Ken is preparing to cover some of the first pieces. Once we figure out exactly how we’re going to do this (how we attach it, glue it down, tack the under-surfaces, and the number of coats of dope) he’ll turn it over to someone else to grind them out. He’s got to get back on the hull for the final planking!
Paul and Dave have been jammin’ on prep-ing and priming all the fittings.
Once the fittings are media blasted, they dip them into a prep solution for a specific amount of time, dip them into the black oxide paint, and then hang them up to dry!
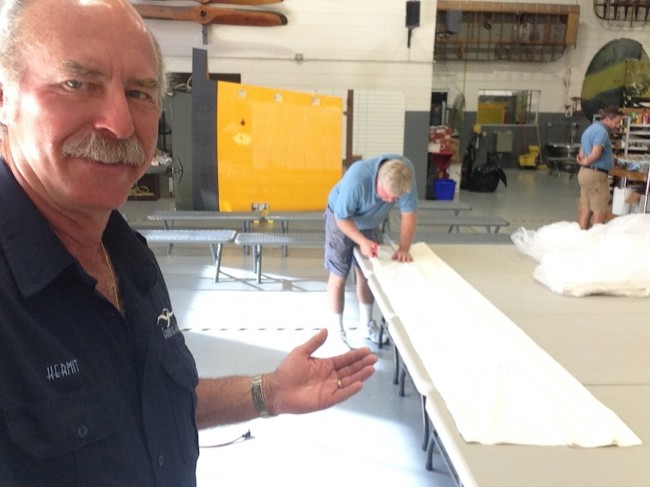
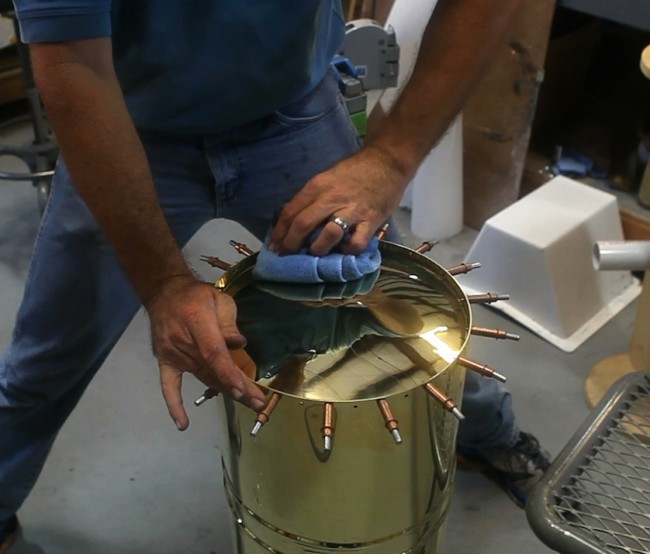
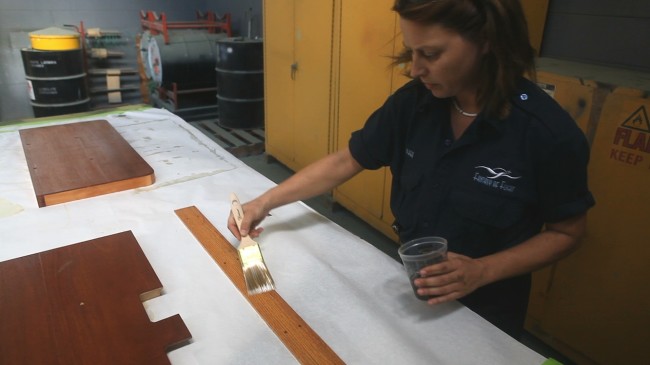
Andrea’s been varnishing and prep-ing the wings for cover. Kermit dug out some pics from our research trip to the Smithsonian that will help determine how it was originally done as they had another model Benoist in the collection. Once we decide on what material we’re going to use for the “drag and anti-drag” straps, we’ll install them on the wings and begin the process of covering 23 pieces!
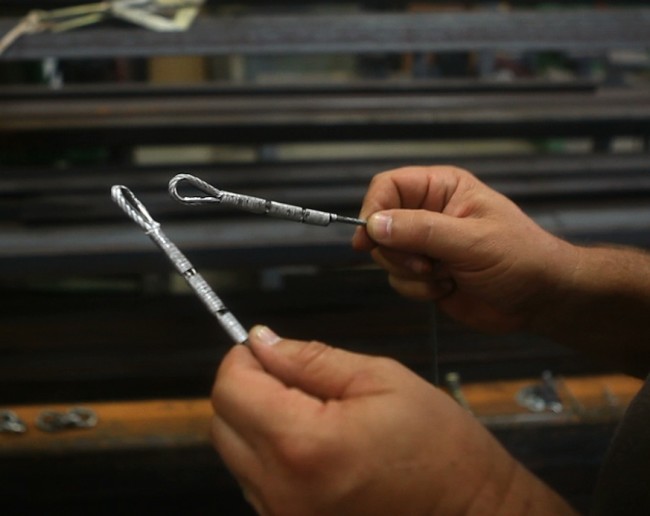
Progress on the Benoist is happening faster and faster! Check out these progress photos from Kermit’s Facebook Page. Here, Andrea works on making cable ends for control cables and all the numerous wires that hold it together.

This is a special wire-wrapping tool, used to form and solder the cable ends, of which there are almost a hundred!
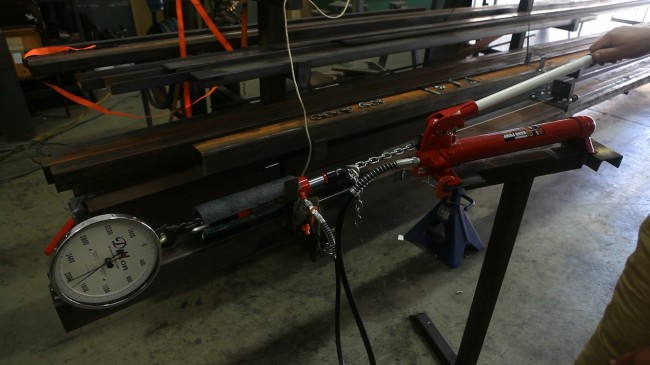
Here are two completed cable ends about to be tested for strength. Of course, they will all be tested again once the turnbuckles and fittings are all incorporated.
Here, Paul gets ready to test the cable strength and the newly formed ends with the testing device that Dave (the welder) made!
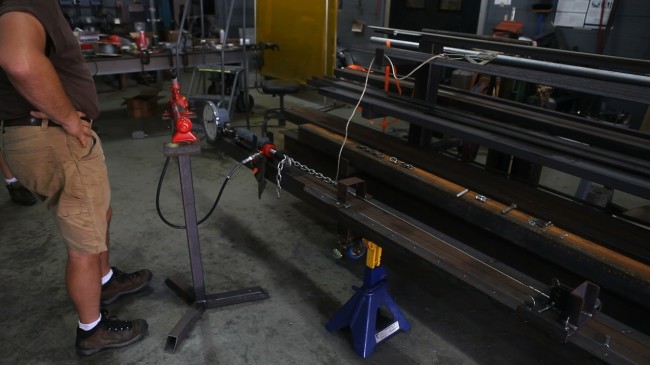
Seems they’re got it figured out. Since the airplane with Kermit and a passenger should weigh about 1700 lbs, so this ought to be strong enough!
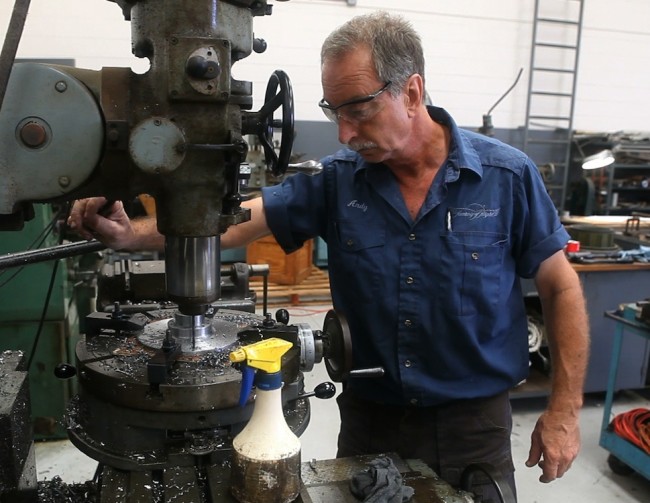
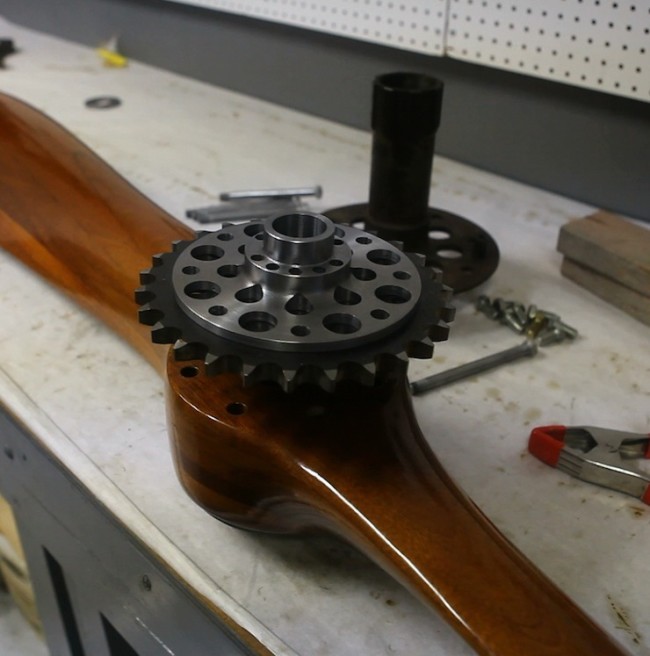
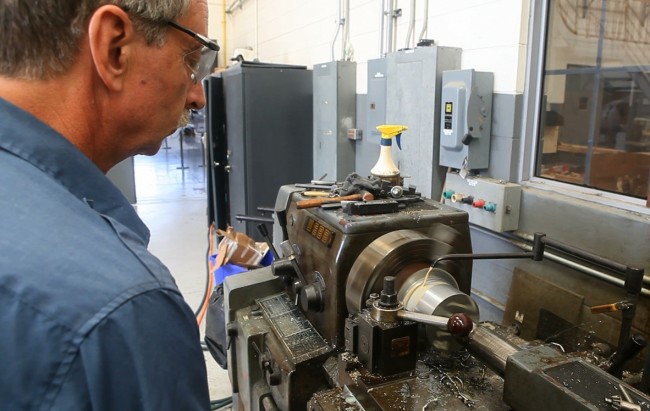
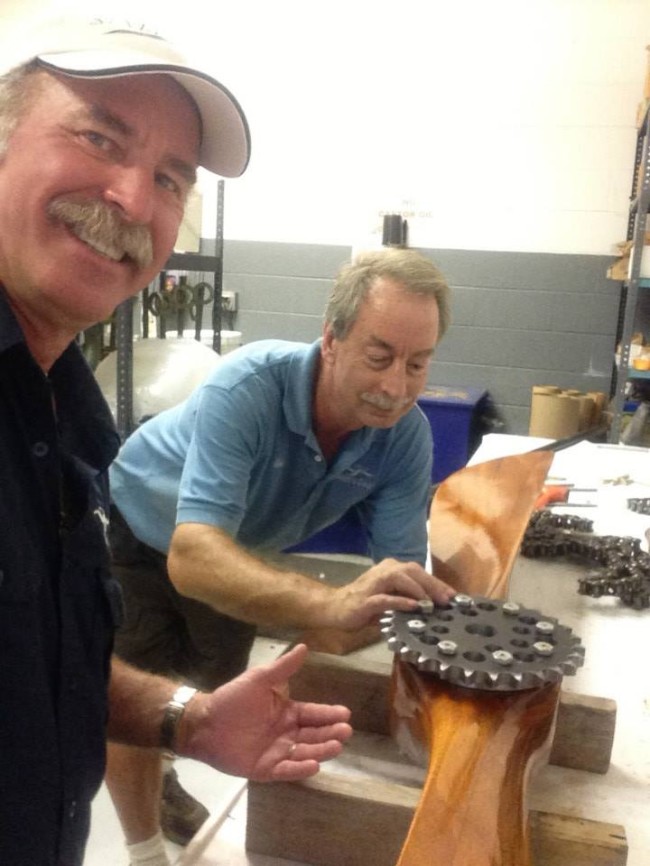
Here, Andy works machines another part for the prop hub drive system.
And here’s the product of his handwork! Looks like we’ve now got some nice spacing for the prop drive chain to clear the propeller.
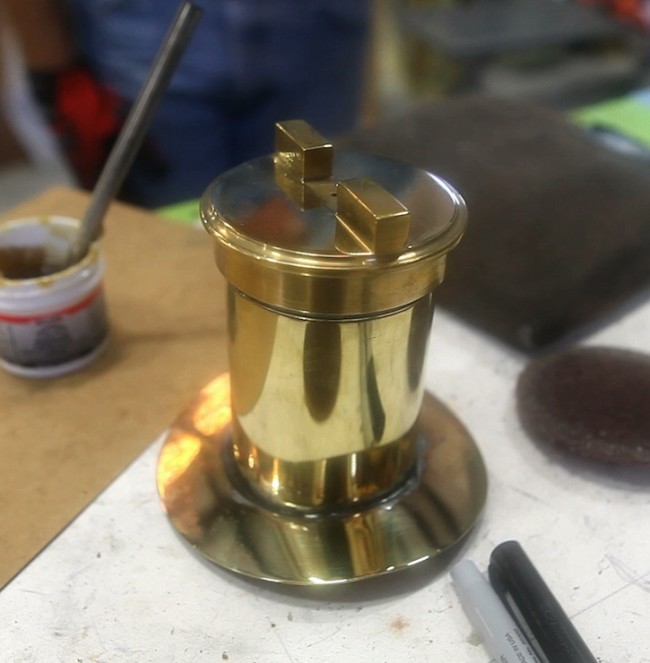
And here’s another piece of art that Andy, Rick, and Dave made: the fuel cap and filler neck for the fuel tank!
Here, Ricky sorts out fitting and polishing the fuel tank ends.
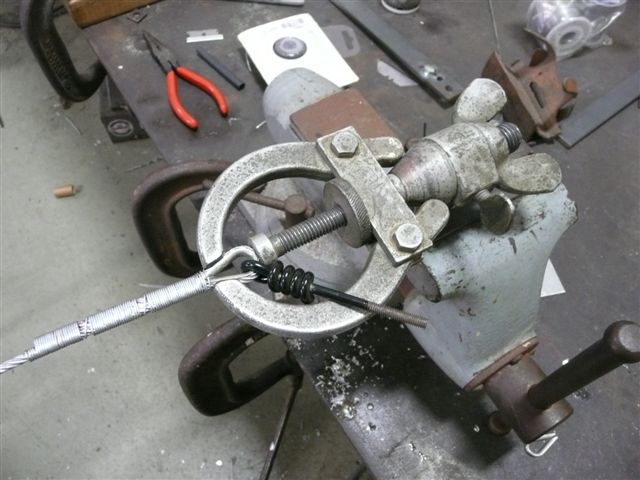
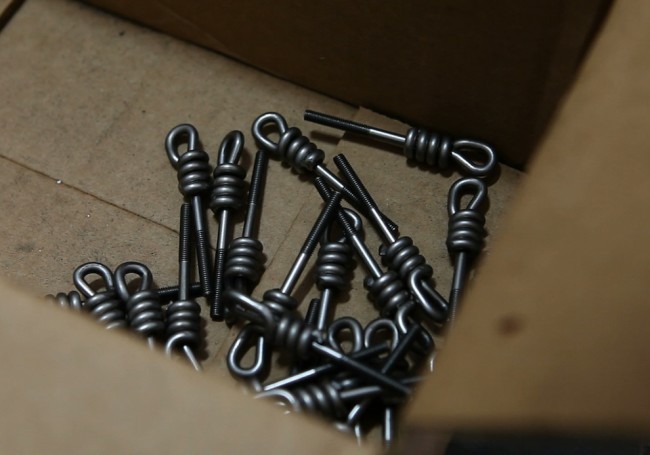
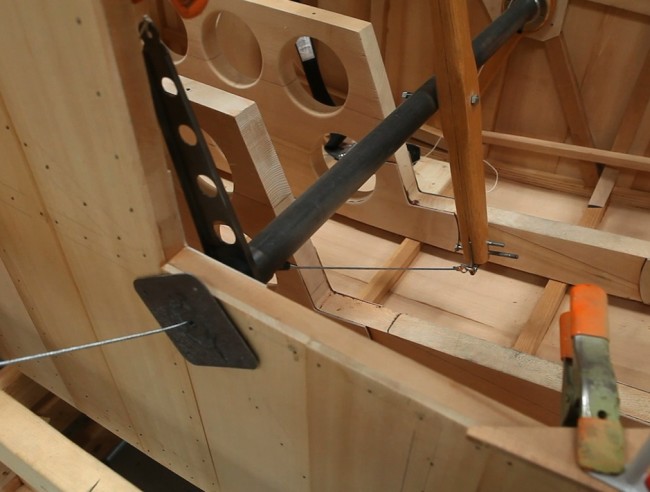
It took us awhile to figure out how to properly make the turnbuckle ends out of wire spokes, as per the original. Here, Dave wraps a spoke around itself in a way that it is strong enough for the job, using the most modern tools available!
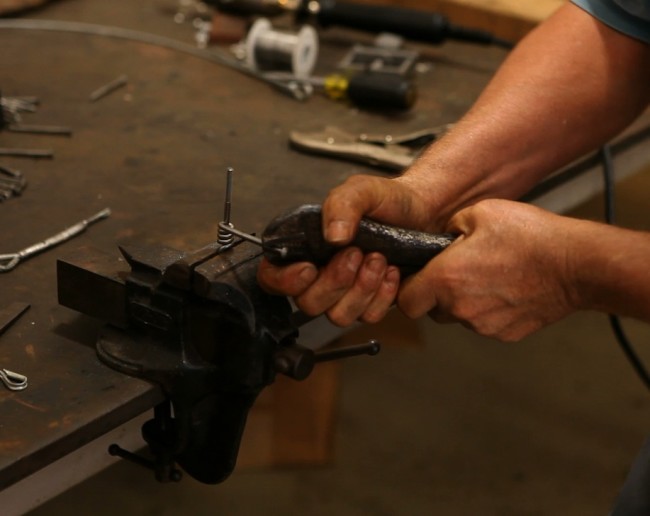
It seems we’re making ends meet … and making progress!
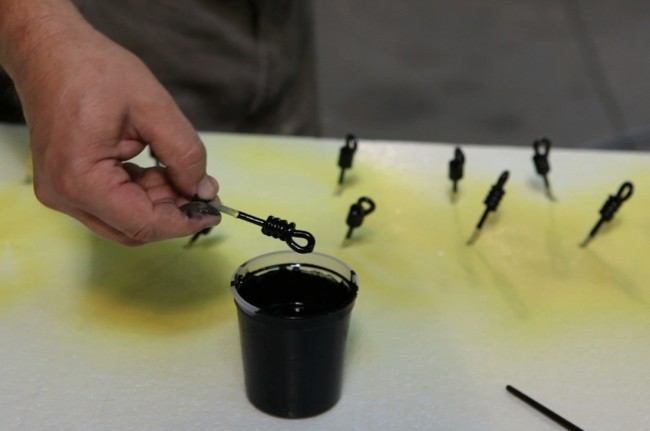
Here, Paul primes and paints the turnbuckle ends by dipping them into a paint can.
While everyone else is working on the parts needed, Ken connects up and rigs the aileron control cables to the stick.
Ken ponders, “OK, now where can I run this cable to make it work?”
Here, Ken attaches an aileron slave strut to interconnect the two ailerons on the right side.
Here, Ken checks to see that we have enough aileron deflection. They didn’t use pulleys back then, so all the control cables are routed through bent pieces of tubing where they turn. Kermit says that he hopes we can find a way to cut down the friction in the system so he can move them if he ever has to use them!
Time marches on… January 1, 2014 will be here before you know it! are you making plans to join us for this historic occasion?
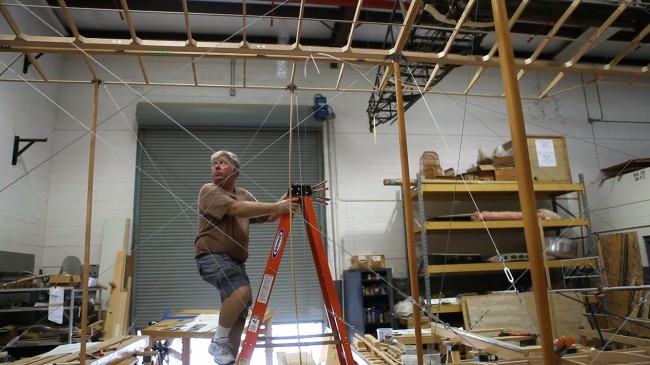
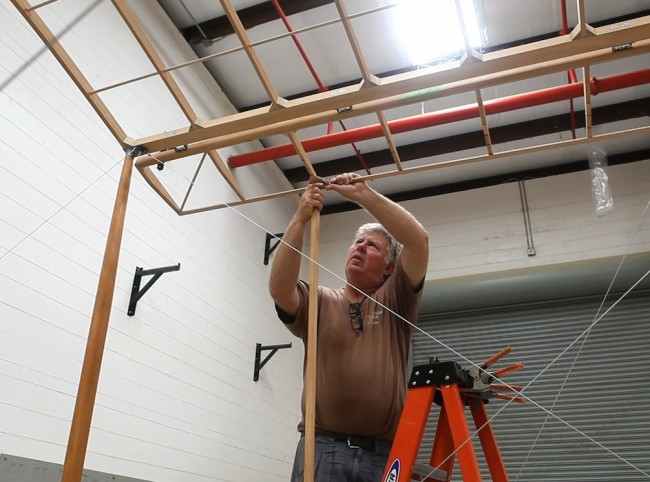
Either our wood shop is getting a lot smaller, or Ken and the rest of the gang are rocking on the Benoist build. We hit a milestone this week as we hung the starboard wings for the first time. Here, the gang all pitch in to hang the upper:
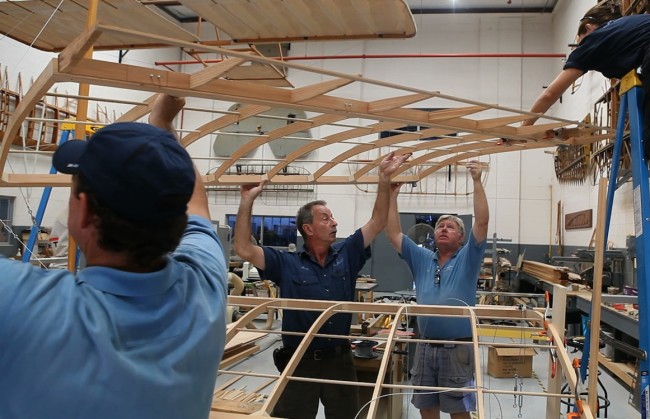
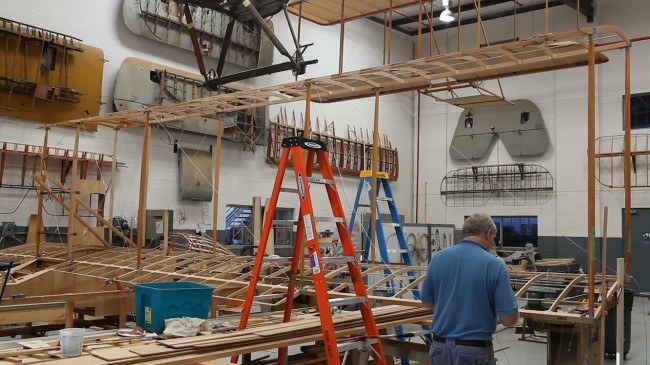
With both the starboard wings up, you can see why we say the shop is getting smaller. How will we fit both sides?!
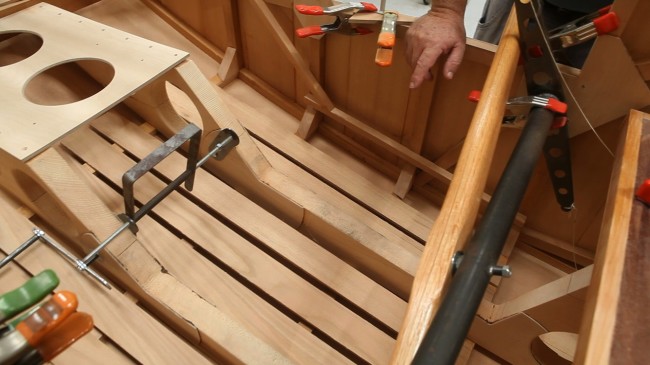
Below, Ken fits the planking for the floorboards in the hull. The metal piece to the left is the beginnings of the foot throttle. In the Benoist, the pilot’s right hand controls the stick for the elevator and ailerons, and their left hand controls the rudder stick. They did things a little different back then.
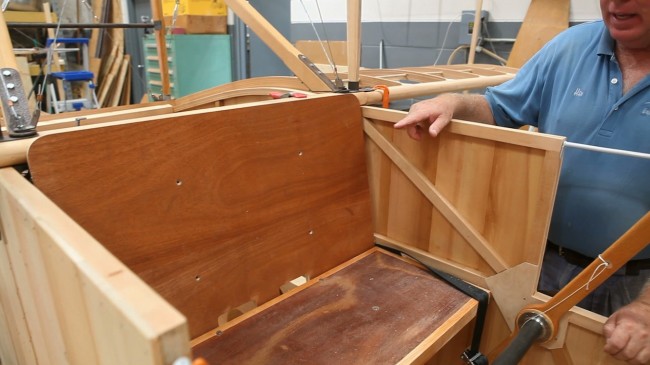
The fuselage is shaping up as well. Below, the seat is being assembled. Makes those airline seats look comfy, doesn’t it?!
Ken’s not the only one working hard either. Andrea has taken on the job of beginning to seal all the wood components.
And here, Andy is machine up more parts for the propeller drive system.
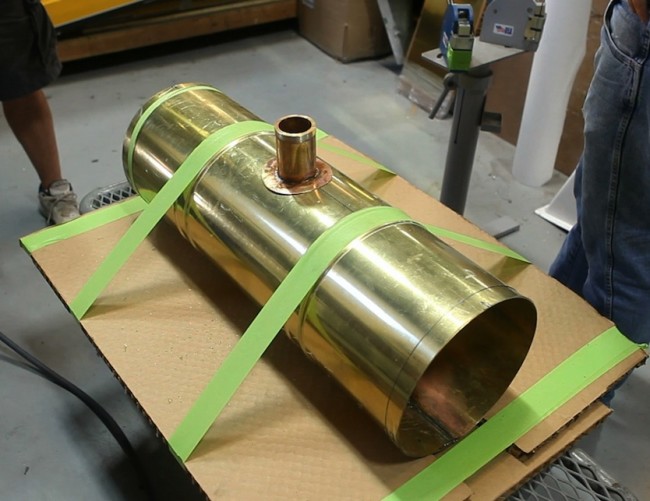
Rick and Dave have put the beads in the fuel tank where the hold down straps will go and have set the cap on that Andy made.
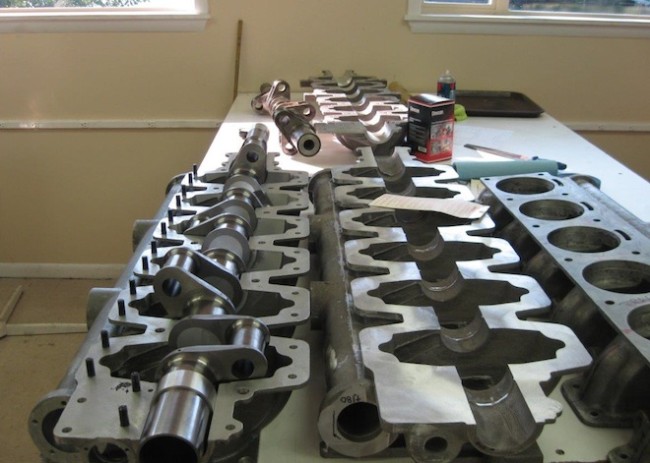
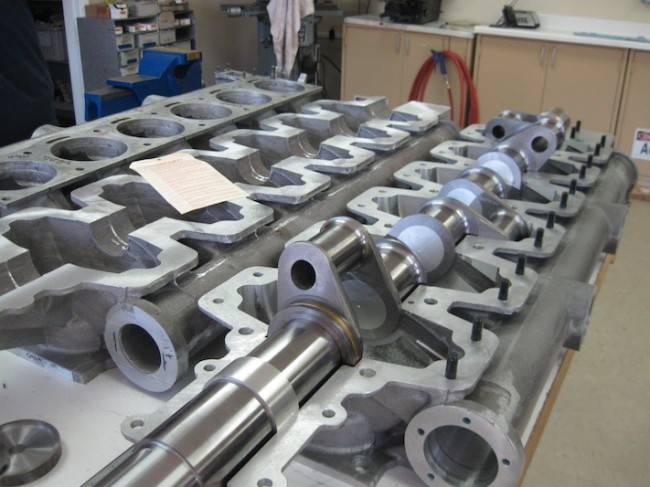
We also heard this week from our friends at Vintage Auto Rebuilds in Ohio. Check out the progress on the 1913 Roberts engine they’re building us from scratch. The crankshaft is done and it appears that the align boring is as well. We can’t wait to hear it run!
With the January 1, 2014 deadline looming, the pace of work on the Benoist is increasing. Ken has made great progress on the fuselage/hull. He still needs to put the last layer of planking on the hull but not until he gets all the inside sorted out and the hull flipped over. Here you can see some of the stringers in the front that are temporarily in position showing the shape of the nose that gets covered with fabric. The controls are temporarily installed. And of course, Kermit strikes his trademarked pose:
Rick made up a mock-up fuel tank out of aluminum, shown here, to fit the mounting brackets and check for clearances. The actual tank will be made of brass which Rick will fabricate once the sheet brass arrives.
Ken has also been laying out where the rudder and elevator cables run down the inside of the hull, through the top turtleneck, and back to the control surfaces.
Andrea and Dave are working on sorting out the wire cables and adjustment ends, which has turned into a bit more than we expected. Andy is machining away on the drive train that includes the prop hub, prop shaft, and sprockets.
All in all, we’re making a lot of progress, but we can all hear that clock ticking in the back of our heads. Will we make it in time?